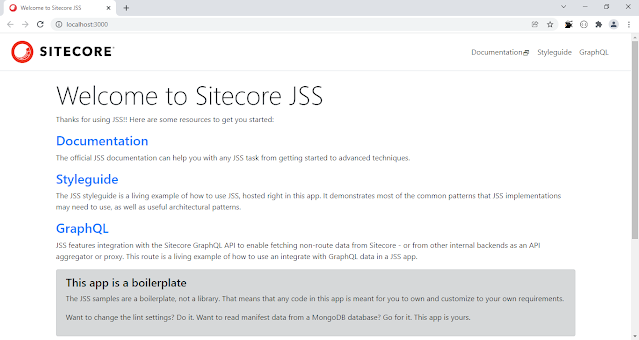
Today I am going to explain the process of creating a Sitecore JSS Application and connecting it with Sitecore or using it without connecting with Sitecore.
Pre-requisites
1. Sitecore should be installed (For connecting JSS Application with Sitecore). If you want to run the application in disconnected mode then the need for Sitecore is not necessary.
2. Node.js must be installed. It is recommended to use the latest LTS Version.
Lets Start
1. Since Node.js is a necessary software that is needed to be installed to work with JSS. You can check the version of Node.js installed in the system using Command Prompt using the below command.
2. Now if you want to connect the JSS App with Sitecore. It is necessary to install Sitecore JavaScript Services. You can get it from the link provided below. Download the version that is compatible with your Sitecore Instance. Make sure to install it using 'Development Tools/Installation Wizard' in your Sitecore Instance. This step is optional if you want to continue in disconnected mode.
https://dev.sitecore.net/Downloads/Sitecore_JavaScript_Services.aspx
3. Now it's time to install JSS CLI. For disconnected mode JSS Application you can directly run the command given below.
npm install -g @sitecore-jss/sitecore-jss-cli
But an important thing to note if you want a connected JSS Application with Sitecore is that you need to specify the version of JSS CLI for protecting yourself from errors at later steps. You need to mention the version of Sitecore JavaScript Services in your command. For example -
I have Sitecore Instance 10.0 and I have installed Sitecore JavaScript Services version 14.0.0 in Step 2 then I have to install JSS CLI using command npm install -g @sitecore-jss/sitecore-jss-cli@14.0.0 else at a later step when we will try to deploy items or connect it with Sitecore it will give an error.
npm install -g @sitecore-jss/sitecore-jss-cli@xx.x.x
Note - Replace xx.x.x with the version of Sitecore JavaScript Services you installed in Sitecore in Step 2.
4. Now you have installed JSS CLI. You can verify it using the below command.
5. Now it's time to create a demo application for JSS. I am going to create a JSS app with react. You can choose angular or next.js whatever you want. Firstly go to the directory where you want to have your JSS app. Then run cmd in administrator mode at that path.
6. Now run the below command to create the application. To run the app in disconnected mode you do not need to worry about the version of the application. Here demoapp is the name of the application and react is the app template.
But to run the app in the connected mode you need to be careful. You must create the application with the same version as your Sitecore JavaScript Services.
jss create demoapp react -b release/xx.x.x
Note - Replace xx.x.x with the version of Sitecore JavaScript Services you installed in Sitecore in Step 2.
7. On running this command you see a folder with all the artifacts is created.
8. You can now open the app in Visual Studio Code. And to run the app open the cmd at the location of the artifacts of the folder and run the below command. This is the disconnected JSS application running at localhost.
9. For Connected mode you have to follow some more steps. Run the below command for connecting the application with Sitecore.
10. Now before moving forward we have to follow some steps in our Sitecore instance. Firstly we need to create an API Key.
- Login to Sitecore and open Content Editor. Now navigate to /sitecore/System/Settings/Services/API Keys and create a new API Key and give it a name.
- Now in CORS Origins and Allowed Controllers enter '*'.
- Now keep a note of the item id (API key).
11. Also create a new hostname in the C:\Windows\System32\drivers\etc\hosts file. Also, add this hostname to your IIS.
12. Now return to the cmd which has been started in step 9. If you have installed the Sitecore JavaScript Services package in Sitecore as mentioned in Step 2 then it will require some settings. It will ask for the below settings -
This command requires a Sitecore connection. Would you like to configure the connection? [y/n]: y
Is your Sitecore instance on this machine or accessible via network share? [y/n]: y
Path to the Sitecore folder (e.g. c:\inetpub\wwwroot\my.siteco.re): C:\inetpub\wwwroot\sitecore100devsc.dev.local
Sitecore hostname (e.g. http://myapp.local.siteco.re; see /sitecore/config; ensure added to hosts): http://demoapp.local
Sitecore import service URL [https://jssapp.dev.local/sitecore/api/jss/import]:
Sitecore API Key (ID of API key item): {C711209D-047B-4E4D-A7EB-470C49FC5853}
Please enter your deployment secret (32+ random chars; or press enter to generate one):
13. Now run the below command to deploy the config file.
Note: CMD must be in admin mode.
14. Now run the below command to deploy the app
15. Now your app is deployed in the Sitecore instance.
That's All for Now
References
Happy Coding
Coders for Life 😊


Great Articld
ReplyDeleteThank you....
Delete