


Note: In SXA, any assets, such as images, fonts, and files that are normally referenced within the stylesheet, are considered to be part of the theme and they are imported with your CSS changes.
Process of Creative Exchange
I will now explain the process of changing the CSS of a Website using Creative Exchange.
I have created a new SXA website and I have added a Promo component in the home of the SXA site.

In the above image, you can see that the button is left-aligned. I want the button to be center-aligned. So I will go to the Sitecore content tree and select the home of the SXA website. Now on the top, you will see the Home tab in the ribbon. In the Home tab, there is an option of Export and Import for Creative Exchange.

Now I will select the Export option. On selecting the Export option a new Export Settings window will pop up.

In this window, you can select different settings of the website you want to export. Like you can select the device, language, Exported content (Single page or complete Site), Mode of website. In my case, I have selected Export to settings as a 'Zip file'.
After you selected the settings you want, click 'Next' to export the website. It will now start the process of Exporting.

When the process of Exporting is complete then you can download the zipped file for the website.

If you forgot the download the package or you want to know where these export packages are stored then you can go to path C:\inetpub\wwwroot\xx.dev.local\App_Data\packages\CreativeExchange. Here you will find all the Creative Exchanges packages.
Note: xx.dev.local is your Sitecore instance name.

Now if you have selected Export to settings as 'Folder on server' during the export process then Sitecore will not generate a zip. It will show the extracted files at the path specified in the Settings of Creative Exchange.

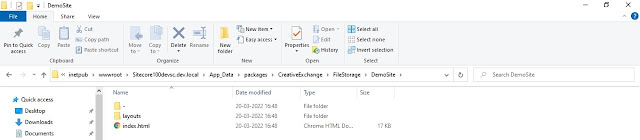
Now when you will open the index.html file then it will show the page exactly similar to what is shown in the Experience Editor mode.

Since the page is now in .html format, front-end developers will now have a better understanding of the design of the page.

Now I have to center the Promo component button so I will edit the CSS file. I am going to use the existing class created while the export process. But we can create a new CSS file also if you need it.

If you open the CSS file created while exporting then you will find that the CSS file is optimized. You have to use some tool to beautify it for readability.

You can use https://www.freeformatter.com/css-beautifier.html tool to format CSS file. Now I will add my custom CSS to make the Promo button center-aligned.

Below is the CSS code I added to make the button center-aligned.
.promo > .component-content .promo-text .field-promolink {
  font-size: 12px;
  background-color: #5e5e5e;
  border-radius: 5px;
  display: inline-block;
  border-width: 1px;
  border-style: solid;
  margin: 0;
  position: absolute;
  top: 95%;
  left: 50%;
  -ms-transform: translate(-50%, -50%);
  transform: translate(-50%, -50%);
  border-color: #474747;
}
After applying the changes I will check my index.html file. And if everything is perfect then make the zip of the folder again.

Now I will upload the changes back to Sitecore. So again I go to Sitecore and select the import process from the Home tab.

On clicking the Import. It will pop up a window where you have to select the import settings. In my case, I will select the option as 'Zip file'.

When you click 'Next' it will ask you to select the package that you want to import. Select the package you created after applying the changes and click 'Next'.

Now it will start the importing process. When the importing is complete then it will display a message of import complete.

Now when you open the page again in experience editor you will find that the CSS is applied to the page and now the button is center aligned.

So this is the whole process of Creative Exchange in Sitecore.
You can read more about different settings available in Creative Exchange from the Sitecore official documentation.
References
Working with Creative Exchange - https://doc.sitecore.com/xp/en/developers/sxa/17/sitecore-experience-accelerator/working-with-creative-exchange.html
Creative Exchange - https://blog.nikkipunjabi.com/2017/09/sitecore-sxa-how-to-export-update-and-import-a-web-design-with-creative-exchange.html
Happy Coding, Coders for Life 😉